
Quick answer: how do you move an aluminum part from prototype to stable production?
Freeze what the production part must be: align the model, drawing, alloy, temper, product form, finish, inspection requirements, annual volume and packaging. Close prototype changes before collecting production approval data.
Run the intended production route: use the approved material source, extrusion die or stock form, production fixtures, CNC program, finishing source, inspection method and packaging. A good prototype made through a temporary route does not prove that production is ready.
Release volume in stages: complete a representative pilot run, review parts and process records, prove the bottleneck rate, close major actions and increase volume through defined gates. Keep lot traceability, change control and a response plan active after launch.
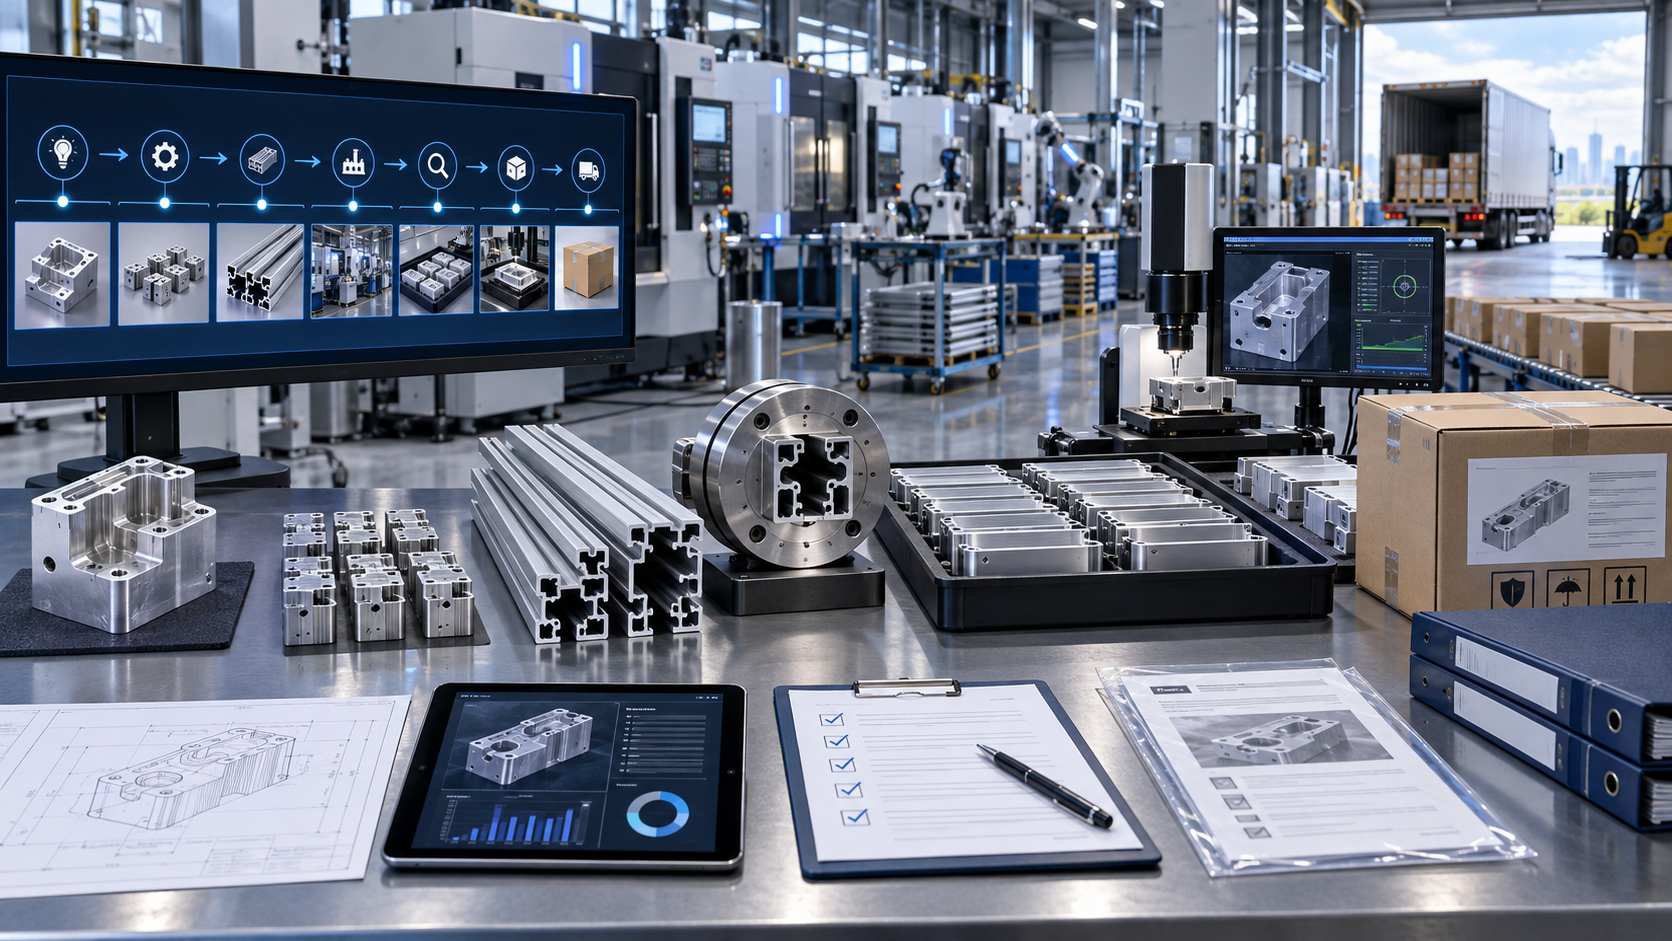
Nine-step prototype-to-production plan
| Step | Action | Do not release until |
|---|---|---|
| 1 | List open prototype findings and production requirements | Owners and due dates are assigned |
| 2 | Select the intended material and manufacturing route | Route risks and alternatives are reviewed |
| 3 | Map every supplier, site and process handoff | Ownership and traceability are clear |
| 4 | Freeze the controlled product definition | Model, drawing and specifications agree |
| 5 | Prepare production tooling, programs and inspection | Revisions and first-off checks are controlled |
| 6 | Run a representative pilot lot | Actual yield, cycle and defect data are available |
| 7 | Complete the required approval package | Product and process evidence is accepted |
| 8 | Prove bottleneck capacity and logistics | The route can meet the agreed demand scenario |
| 9 | Ramp in stages and monitor performance | Each gate meets its quality and delivery criteria |
Step 1: close prototype findings and choose the production route
State whether production will use billet machining, custom extrusion plus CNC, sheet fabrication, casting or a hybrid route. A prototype machined from solid plate may prove geometry quickly but does not validate extrusion die behavior, profile variation, production fixtures or coating appearance.
BAOSONG’s prototype versus production CNC guide explains the different objectives. Use the extrusion, CNC and die-casting comparison to choose the intended route before design and tooling are frozen.
- List every prototype issue, temporary deviation and manual correction.
- Mark each item as design change, production-process action or accepted risk.
- Assign an owner, evidence required and closure date.
- Compare candidate routes using volume, geometry, tolerance, finish, tooling and lead-time needs.
- Record the selected route and the conditions that could force a later review.
Step 2: map every supplier, process and handoff
Map material producer, distributor, extruder, heat treatment, saw cutting, CNC machining, deburring, finishing, testing, inspection, packaging and logistics. Identify which organization owns each step, record and corrective action.
For outsourced operations, define the approved source, specification flow-down, lot transfer, quantity reconciliation and change-notification route. One prime supplier can simplify communication, but the underlying process chain still needs visibility.
Create one route table with these columns: process step, company and site, incoming condition, outgoing condition, controlled document, lot ID, record produced, approver and backup route. Walk one pilot lot through the table and confirm that its identity can be followed forward and backward.
Step 3: freeze one controlled product definition
Align the 3D model, drawing, bill of materials, alloy, temper, product form, finish, inspection plan, packaging specification and approved deviations. Name document precedence and release authority.
Production risk rises when purchasing, manufacturing and inspection work from different revisions. Every route participant should receive only the applicable controlled data, with obsolete files removed from use.
- Compare the 3D model and 2D drawing feature by feature.
- Confirm alloy, temper, product form and permitted substitutions.
- Identify critical, cosmetic and safety-related requirements.
- Attach finish, masking, packaging and inspection specifications.
- List every approved deviation with its affected quantity or expiry.
- Issue a release record showing who approved the baseline and when.
Step 4: approve material, temper and source
Choose the alloy and temper for the final route, not only for prototype availability. Plate, bar and extrusion in the same alloy can have different specifications, properties, stock conditions and residual-stress behavior.
Approve material sources, certificate fields, lot identity, substitution rules and contingency sources. BAOSONG’s aluminum alloy selection guide helps connect material choice to machinability and finishing.
For the pilot lot, record the material specification, supplier, heat or lot number, certificate received, incoming size and condition. Do not substitute plate, bar or extrusion only because the alloy name matches; confirm the product form and required properties.
Step 5A: prepare a custom extrusion route
For an extrusion-led route, review circumscribing circle, wall balance, hollows, tongue support, seam-weld location, die correction, quench, stretching, aging, straightness and cut strategy. Freeze profile identity and die revision before downstream fixtures are finalized.
The Aluminum Extruders Council’s design resources cover alloys, dies, tolerances, fabrication and finishing. BAOSONG’s custom extrusion design guide provides additional DFM context.
- Release the controlled profile drawing and die number.
- Record trial results for wall, contour, twist, straightness and cut condition.
- Close die corrections before downstream fixture approval.
- Mark which profile surfaces remain as-extruded and which will be machined.
- Approve the incoming profile checks used before CNC machining.
Separate extrusion tolerances from CNC requirements
Identify which surfaces remain as extruded and which are machined. Apply profile-level controls to wall thickness, contour, twist, straightness and cut length, then use CNC datums and tolerances for critical interfaces.
AEC’s extrusion tolerance guidance notes that complex components may need GD&T and that tighter requirements should be discussed with the extruder. Do not force machining-level tolerances onto an entire profile when only a local interface needs them.
Step 5B: convert prototype CNC work into a production process
Freeze machine family, number of setups, datum transfer, workholding, tool list, offsets, program revision, deburring and first-off approval. Production fixtures must control the profile without distorting thin walls or hiding incoming variation.
Record cycle time, tool life, offset adjustment and scrap during representative runs. BAOSONG’s CNC machining overview provides context for precision features and secondary operations.
- Release the machine family, fixture and program revision.
- Define setup datums and how they transfer between operations.
- Run a first-off part and obtain the required approval.
- Record tool-change triggers and permitted offset adjustment.
- Separate normal deburring from unapproved rework.
- Capture cycle, stoppage, scrap and inspection data during the pilot lot.
Step 5C: qualify finishing in the final process sequence
Anodizing, conversion coating, powder coating, brushing and polishing can change dimensions, appearance, conductivity and handling requirements. Validate masking, rack locations, pretreatment, coating specification, color reference, sealing and packaging on production-representative parts.
Changing the finishing source after sample approval can change appearance and fit. Use BAOSONG’s surface-finishing overview to identify details that belong in the production baseline.
Send pilot parts through the same pretreatment, masking, racking, coating or anodizing, sealing, inspection and packaging sequence planned for production. Approve the finished condition rather than relying on unfinished dimensional results.
Set inventory and lead-time rules for each stage
Map the lead time and minimum economic quantity for billet, extrusion campaigns, heat treatment, CNC production, finishing and transport. Decide where raw material, unfinished profiles and completed parts may be buffered without hiding quality problems or consuming cash unnecessarily.
Define reorder points from verified demand, replenishment time, yield and disruption risk. Separate safety stock from nonconforming, obsolete or unapproved inventory. For custom extrusions, holding a controlled quantity of unfinished lineal can shorten response while preserving flexibility, but only if storage prevents damage, corrosion and lot-identity loss.
Agree who owns material and tooling at each location, how forecasts become firm orders and how schedule changes are communicated. A stable route needs clear allocation rules during shortages rather than informal expediting after customer demand has already been missed.
Step 6: run a representative pilot lot
The pilot must use the intended route. Agree the lot quantity and production rate before the run. Use approved material, production tooling, released programs, normal operators, planned finishing, inspection, packaging and logistics. Record every exception.
- Hold a pre-run review and confirm documents, material, tooling, gages and operators are ready.
- Record the first-off result before continuing the lot.
- Track start time, stop time, planned and unplanned downtime.
- Record accepted parts, scrap, rework and defect category at each process.
- Keep parts identified by material lot, machine, fixture and finishing batch where required.
- Measure the agreed critical and high-risk features using the released method.
- Pack the accepted parts using the intended production packaging.
- Review every deviation and open action before the approval gate.
A hand-built sample or a pilot run supported by hidden sorting and rework cannot demonstrate normal production. Record temporary controls openly and give each one an owner and exit condition.
Step 7: review evidence and release each gate
| Gate | Main question | Typical evidence | Release condition |
|---|---|---|---|
| Concept | Can the selected route make the intended geometry? | DFM review, risk list and route comparison | Manufacturing concept approved |
| Prototype | Does the design function? | Sample results, assembly and design learning | Design changes incorporated |
| Tooling | Can production dies and fixtures create the baseline? | Die trials, fixture studies and process records | Tool corrections closed |
| Pilot | Can the intended route run repeatedly? | Representative lot, yield, dimensions and cycle data | Process risks controlled |
| Approval | Does product and process evidence meet customer requirements? | FAI or PPAP, certificates, capability and samples | Formal disposition recorded |
| Ramp | Can output increase without losing control? | Capacity, quality, delivery and action trends | Stable-rate criteria achieved |
Use APQP and PPAP where the customer requires them
AIAG’s APQP 3rd Edition adds emphasis to sourcing, change management, risk mitigation and gated program management. These concepts are useful beyond automotive when tailored to the project.
AIAG PPAP focuses on demonstrating that design records and specifications can be met consistently during an actual production run at production rates. State the applicable edition, submission level and customer additions; PPAP is not automatic for every aluminum component.
Check the measurement system before capability
Match CMM, gages, optical systems, profilometers and visual standards to the drawing and part condition. Align datums, restraint, temperature, method and decision rules between supplier and buyer.
NIST research on measurement-equipment selection connects design information to inspection requirements. A capability result is credible only when the measurement system and process conditions support it.
Preserve material and process traceability
Define whether parts trace to a heat, extrusion run, production lot or individual serial number. Preserve identity through cutting, machining, finishing, rework and shipment. Records should support both backward investigation and forward containment.
NIST’s Manufacturing Supply Chain Traceability Meta-Framework describes linked, time-ordered provenance records and selective disclosure across supply ecosystems. Apply a traceability depth appropriate to product and customer risk.
Step 8: prove capacity at the real bottleneck
Model extrusion press time, aging, saws, machining, deburring, finishing, inspection and packaging at the forecast mix. Use demonstrated cycle time, yield, uptime, maintenance and staffing rather than installed machine count alone.
Identify the constraint and the trigger for added tooling, fixtures, shifts or qualified outside capacity. A route is unstable when one unverified process must operate at perfect uptime to meet demand.
- Calculate demand by part family and production mix.
- Measure demonstrated cycle time and changeover at each major step.
- Apply observed yield, downtime and maintenance rather than ideal machine speed.
- Identify the step with the lowest demonstrated output.
- Check labor, tooling, inspection, finishing and packaging capacity around that step.
- Record the capacity gap, owner, action and completion trigger.
Step 9: ramp volume through controlled releases
Increase volume through defined stages with entry and exit criteria. Track first-pass yield, scrap, rework, dimensional trends, cosmetic defects, supplier escapes, throughput and on-time delivery. Review data by material lot, die, machine and finishing batch where useful.
Temporary launch controls should have owners and exit rules. Extra inspection can protect early deliveries, but long-term stability requires corrective action and capable processes.
At each ramp review, compare actual demand, output, first-pass yield, scrap, open actions, late orders and customer feedback with the approved gate criteria. Hold the next increase when a major defect is uncontrolled, traceability is broken, required evidence is missing or the bottleneck cannot support the planned rate.
Plan packaging and logistics before launch
Validate separators, protective films, bagging, cleanliness, orientation, stacking, labels, palletization and transport conditions on finished parts. Cosmetic anodized surfaces and long profiles often need different protection from small machined parts.
Define shipment lot, document package, traceability labels, storage limits and response to transport damage. Packaging must preserve the condition that passed final inspection.
Approve second sources before an emergency
A second billet source, extruder, die, machine shop or anodizer can change geometry, metallurgy, appearance and measurement results. Qualify the alternate route against the same product definition and identify its approved scope.
Dual sourcing adds resilience only when tooling access, files, capacity, samples, quality records and commercial terms are ready. An untested supplier name on a contingency plan is not a production route.
Define change notification and revalidation
Require advance notice for changes to material source, alloy or temper route, extrusion die, press, heat treatment, site, machine family, fixture, program, finishing source, inspection method or packaging when they affect the approved baseline.
Classify changes by risk and define the required response: document review, selected testing, partial first article, capability update, full approval or customer authorization. Update every linked document before release.
Monitor the route after production approval
Use a balanced scorecard covering quality, delivery, responsiveness, change compliance, documentation, corrective-action effectiveness and capacity. Review trends and significant events instead of relying only on an annual average.
Audit the highest-risk interfaces periodically: material-to-extrusion, extrusion-to-machining, machining-to-finish and final inspection-to-shipment. A stable route remains observable and correctable.
Copy-ready production transfer checklist
Use this list at the transfer review. Replace bracketed fields with the project requirement and assign an owner to every open item.
- Product definition: [model, drawing and specification revisions].
- Prototype findings: [closed items and approved remaining risks].
- Production route: [sites, suppliers and process sequence].
- Material: [alloy, temper, form, source and certificate fields].
- Tooling: [die, fixture, gage and ownership records].
- CNC baseline: [machine family, program and setup revisions].
- Finishing baseline: [source, specification, masking, color and rack locations].
- Inspection: [characteristics, methods, frequency and records].
- Pilot run: [lot quantity, rate, yield, defects and deviations].
- Approval package: [FAI, PPAP or customer-specific evidence].
- Capacity: [demand scenario, bottleneck and demonstrated output].
- Packaging and logistics: [pack revision, label, route and storage].
- Ramp gates: [volume stages, release criteria and approvers].
- Change control: [notification triggers and revalidation rules].
- Continuity: [buffer, backup route and recovery owner].
How to troubleshoot an unstable supply route
| Problem | Check first | Immediate action | Permanent correction |
|---|---|---|---|
| Pilot parts pass but production drifts | Material lot, fixture, tool life, offsets and measurement method | Contain the affected lot and compare with the approved baseline | Remove the special prototype condition and control the production source of variation |
| Profile variation causes CNC scrap | Extrusion contour, twist, straightness, cut condition and fixture loading | Segregate incoming profiles and review datum pickup | Align profile controls, die correction and CNC fixture capability |
| Color changes between lots | Alloy lot, pretreatment, finish batch, rack position and visual method | Hold mixed lots and inspect against the approved standard | Control the finishing route and appearance acceptance conditions |
| Documents do not match the parts | Revision issue, lot transfer and outsourced-process records | Stop release and restore traceability | Fix document distribution and lot reconciliation at the handoff |
| Output misses the ramp plan | Actual bottleneck, downtime, yield, staffing and outside-process queue | Protect committed orders and revise the short-term schedule | Remove the verified constraint or qualify planned capacity |
| Damage appears after shipping | Packaging revision, loading pattern, route and receiving evidence | Preserve the package and contain the affected shipment | Correct and revalidate the complete shipping unit |
Stop conditions before the next ramp stage
- A critical product requirement is not met or its measurement is disputed.
- Material, process or finishing traceability is incomplete.
- A major pilot deviation remains open without approved containment.
- Scrap or rework hides the true production rate.
- The bottleneck cannot meet the next demand stage.
- Required customer approval or submission evidence is missing.
- A supplier or process change has not received the required review.
- Packaging does not preserve the accepted finished condition.
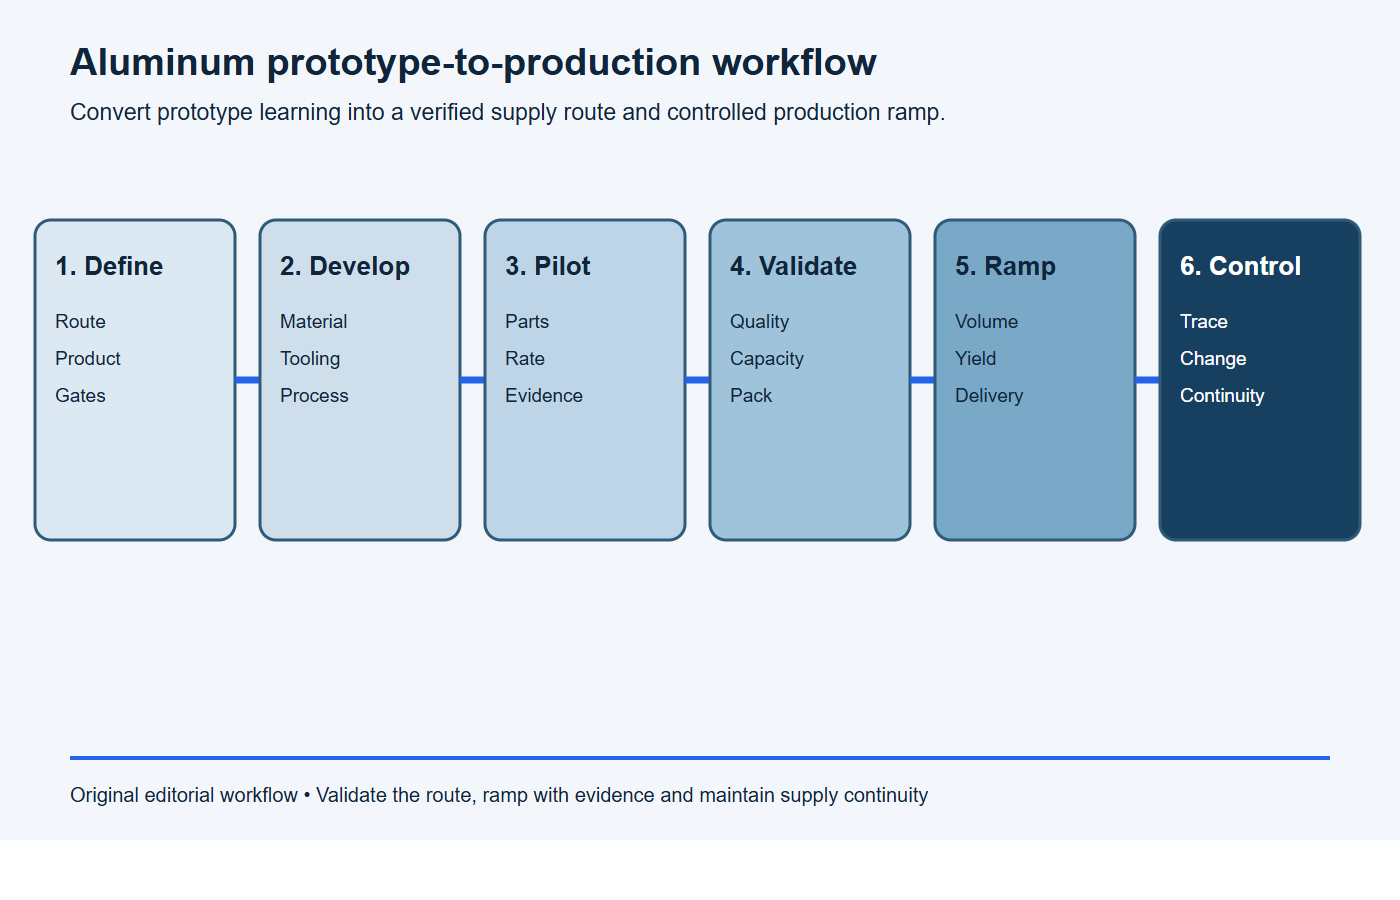
Use a controlled industrialization workflow
- Define: select the production route, requirements, volume and approval gates.
- Develop: finalize material, extrusion, tooling, CNC, finishing and inspection plans.
- Pilot: run representative parts through the intended supply chain.
- Validate: confirm product, process, capability, capacity, documents and packaging.
- Ramp: increase output through measurable quality and delivery criteria.
- Control: monitor performance, trace lots, manage changes and maintain continuity.
Stable aluminum supply-route checklist
- Controlled drawing, model, material, finish and inspection requirements.
- Named production route, sites, sub-suppliers and process owners.
- Approved alloy, temper, product form, sources and traceability depth.
- Extrusion die, profile tolerance, CNC fixture and program baselines.
- Qualified finishing, appearance standards and packaging.
- Representative pilot run, yield, capability and document evidence.
- Capacity model for every bottleneck and realistic contingency plan.
- Formal approval, ramp criteria, scorecard and escalation route.
- Second-source validation and change-notification requirements.
- Forward and backward traceability with effective lot containment.
Frequently asked questions
Can a CNC prototype approve an extrusion-based production route?
It can approve aspects of design and function, but it does not validate extrusion die behavior, profile variation, production fixtures or the final material and finishing route.
When should production tooling be frozen?
After critical design and DFM risks are resolved, but before capability and approval data are collected. Any later correction should remain controlled and trigger appropriate revalidation.
How do you know the supply route is ready to ramp?
The representative route has met agreed product, yield, capability, capacity, documentation, packaging and delivery criteria, with significant open actions closed or formally contained.
Does dual sourcing automatically reduce risk?
No. It reduces risk only when the alternate source and its material, tooling, process, measurement and logistics route are qualified and ready to operate.
Request an aluminum industrialization review
Send the design revision, prototype status, intended production route, alloy and temper, volumes, finish, critical requirements, approval package and launch timing through BAOSONG’s contact page. BAOSONG’s quality overview provides additional context for planning production evidence.
Recommended Downloads for RFQ & Supplier Qualification
Use these BAOSONG templates to prepare complete RFQs, align supplier quality expectations and reduce review cycles before quotation or NPI release.
- Aluminum Manufacturing RFQ Checklist (editable Excel)
- Drawing Review Submission Checklist (editable Excel)
- New Product Introduction Information Sheet (editable Excel)
- Supplier Quality Requirement Template (editable Excel)
Need help preparing an RFQ or supplier document package? Contact BAOSONG Precision.