
Quick answer: how do you package cosmetic and precision aluminum parts?
Start with the part requirements: mark visible surfaces, critical dimensions, bores, threads, sealing faces, fins and thin walls. Here, “cosmetic” means an appearance-critical aluminum surface, such as a visible anodized housing or brushed panel.
Pack each part so it cannot rub, move or trap moisture: use clean, finish-compatible contact materials, individual cavities or separators, suitable caps and enough support to prevent bending. Avoid pressure on visible faces and weak features.
Release the shipment only after checking the complete pack: verify part condition, quantity, orientation, protection, closure, label and pallet stability. For a new or high-risk route, test the finished shipping unit and inspect the parts again after the test.
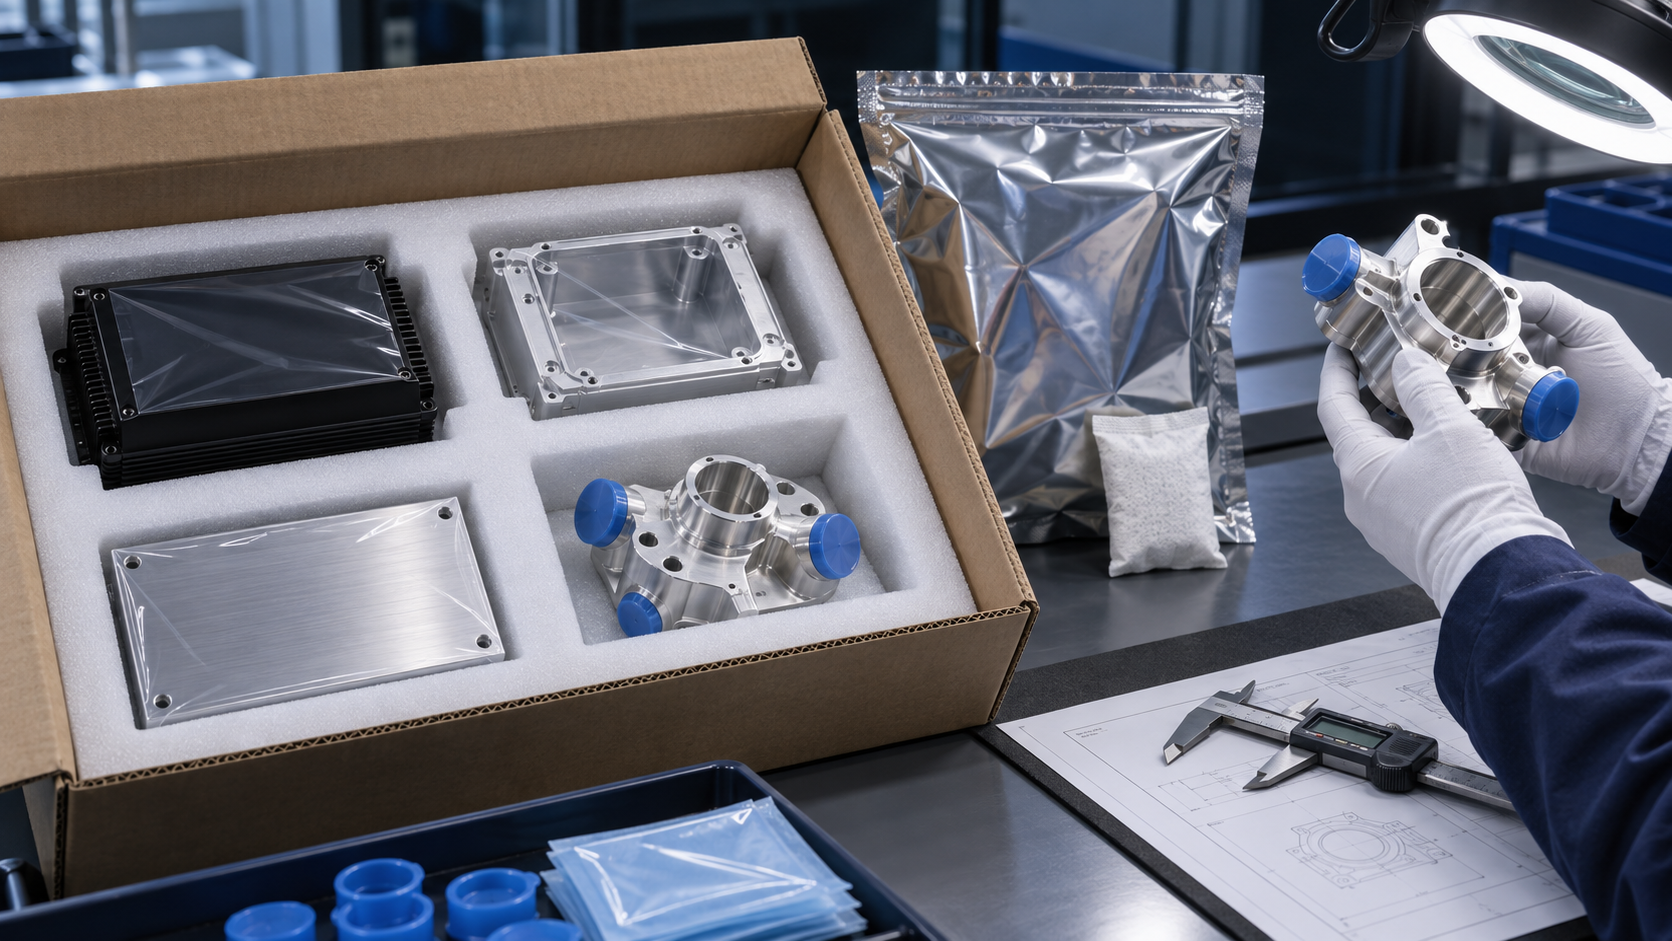
Eight-step packaging procedure
| Step | Action | Release check |
|---|---|---|
| 1 | Collect the drawing, finish requirement, cosmetic map, quantity and shipping route | Correct part and revision are identified |
| 2 | Inspect, clean and dry the parts before packing | No visible defect, loose chip, oil or moisture |
| 3 | Mark the surfaces and features that need protection | Packers can see what must not be touched or loaded |
| 4 | Select and qualify all materials that touch the part | No scratch, stain, residue or unwanted particle transfer |
| 5 | Protect each part and load it in a fixed position | No metal-to-metal contact or damaging movement |
| 6 | Add moisture control when the route requires it | Parts are dry and the barrier system is complete |
| 7 | Close the container and secure the unit load | Carton, crate or pallet is stable and correctly closed |
| 8 | Label, photograph and release the shipment | Count, lot, label and packaging record match |
Step 1: collect the packaging inputs
Do not begin with foam or a carton. Begin with the information that determines the pack. The packer or packaging engineer needs:
- part number and drawing revision;
- alloy, temper and finished condition;
- cosmetic surface map or approved appearance sample;
- critical dimensions and features that can be damaged;
- cleanliness and residue requirements;
- quantity per pack and shipment;
- transport mode, transfers, storage time and climate;
- customer label, pallet and receiving requirements.
If information is missing, record the assumption and obtain approval before fixing the packaging design. BAOSONG’s surface-finish drawing guide explains how to communicate finish zones and acceptance information.
Step 2: inspect, clean and dry the parts
Never package a defect and expect the package to hide it. Inspect the required cosmetic surfaces and critical features before packing. Remove loose chips and approved process residue using the specified cleaning method. Parts must be dry before they enter a bag, tray or wrap.
- Confirm the part number, revision and quantity.
- Inspect visible faces under the agreed lighting and viewing conditions.
- Check vulnerable dimensions when the control plan requires it.
- Remove loose contamination without dragging it across the finish.
- Allow cleaned parts to dry completely.
- Move accepted parts to a clean packing area and segregate rejected parts.
Use clean gloves when fingerprints or skin oils can affect appearance, bonding or sealing. Do not use an unapproved cleaner, oil or corrosion inhibitor. BAOSONG’s guide to cosmetic requirements for aluminum CNC parts provides a practical framework for visual acceptance.
Step 3: mark the no-touch and no-load zones
Print a simple part image in the packing instruction. Use it to identify:
- No-touch zones: visible anodized, brushed, polished or coated faces.
- No-load zones: thin walls, fins, knife edges, unsupported covers and delicate bosses.
- Keep-clean zones: gasket lands, bonding surfaces, fluid passages and electrical contacts.
- Protected features: threads, ports, bearing seats, precision bores and datum surfaces.
- Support zones: strong surfaces that may safely rest in a tray or fixture.
A packer should be able to identify these zones without interpreting a complex GD&T drawing. The drawing remains the controlling engineering document; the packing image turns its relevant requirements into a clear shop-floor instruction. BAOSONG’s aluminum CNC tolerance guide explains why the feature, datum and inspection condition must remain connected.
Step 4: qualify materials that touch the finish
A direct-contact material is any film, bag, paper, foam, cap or tray surface that touches the part. Do not approve it only because it feels soft. Test it with the actual finish and the longest expected storage period.
- Place a clean finished sample against the proposed material.
- Apply the contact pressure expected in the package.
- Expose the sample to the expected time, temperature and humidity range.
- Remove the film, foam or cap using the planned method.
- Inspect for scratches, gloss change, dye transfer, imprint, stain, adhesive residue and particles.
- Record the material name, supplier, grade and approval result.
For peelable film, define which faces receive film, how edges are trimmed, maximum storage before removal and the removal direction. For foam, check shedding, compression marks and whether a tight cavity can load a visible surface. Review the chosen protection against the actual anodized, brushed, polished or coated condition described in BAOSONG’s surface-finishing overview.
Step 5: protect and load each part
Small anodized or painted housings
- Fit approved caps to ports and threads where required.
- Place the part in an individual clean bag, sleeve or tray cavity.
- Support the part on strong, non-cosmetic areas.
- Keep visible faces away from cavity edges and carton walls.
- Close the bag or retain the part so it cannot leave its position.
Brushed panels and visible covers
- Apply qualified protective film without trapping chips or wrinkles.
- Protect corners and separate every panel.
- Support the panel flat to prevent bending.
- Do not place a strap, hard divider or heavy part over the visible face.
Precision machined parts
- Cap only the features identified in the packing instruction.
- Keep foam and cap edges away from datums and sealing lands.
- Orient the heavy section toward the support surface.
- Use a divided tray or cell so parts cannot collide.
- Check that the top pad or lid cannot press on a thin wall.
Long aluminum extrusions
- Protect visible faces before bundling.
- Place separators at controlled intervals to prevent profile-to-profile rubbing.
- Add edge protection under straps.
- Support long spans to limit bending.
- Secure the bundle without crushing hollow sections or thin flanges.
See BAOSONG’s CNC machining overview and aluminum extrusion overview for the different geometries that packaging may need to protect.
Step 6: add moisture protection when needed
Moisture can leave stains when it is trapped between aluminum surfaces. Ocean freight, uncontrolled warehouses and large temperature changes increase condensation risk.
- Confirm that parts and packaging materials are dry.
- Keep bare aluminum away from wet wood, damp paper and standing water.
- Use a sealed barrier bag when the route and storage period require one.
- Add the specified desiccant only inside the defined barrier system.
- Use a humidity indicator when the customer requires evidence of package condition.
- Seal the barrier using the approved method and inspect the closure.
Do not add a desiccant pouch to a porous carton and assume the problem is solved. The packaging engineer should define barrier material, closure, desiccant calculation and permitted exposure time.
Step 7: close the carton, crate or pallet
The outer pack must restrain the product and survive handling. Fill only the designed spaces. Loose filler can migrate, and excessive top pressure can mark parts. Close the container using the approved tape, fastener, strap or clip pattern.
- Confirm the correct quantity and layer pattern.
- Check that inserts and top pads sit flat.
- Perform the specified movement check; parts must remain in their cells.
- Keep steel straps away from aluminum with suitable edge protection.
- Keep cartons within the approved gross mass and stacking direction.
- Secure cartons to the pallet without crushing them.
- Provide defined forklift entry and keep the load within the pallet footprint.
Large or heavy parts may need blocking and bracing inside a crate. Place supports under strong load paths and provide safe lifting access. If wood packaging is used internationally, confirm the destination’s applicable phytosanitary requirements.
Step 8: label, photograph and release
Apply the label where it remains readable without opening the package. Include the fields required by the customer, such as part number, revision, quantity, manufacturing lot, purchase order, package number and handling direction.
Before release, photograph the open pack, protection layers, closed container, label and completed pallet when the control plan requires evidence. Link the images and inspection record to the shipment or lot. BAOSONG’s quality overview provides context for inspection and production records.
Copy-ready packing instruction example
This example shows the level of detail a work instruction should contain. Replace every bracketed item with approved project data.
- Verify part [part number/revision] and accepted quantity [quantity].
- Wear [approved glove type]. Confirm parts are clean, dry and released by [inspection record].
- Apply [approved film] to surfaces [zone IDs]. Do not cover [excluded features].
- Install [cap/plug ID] on [features]. Do not contact datums [datum IDs].
- Place one part in each cavity of tray [tray ID and revision], orientation [drawing/photo reference].
- Stack [number] trays with [separator/top pad]. Confirm no part can leave its cavity.
- Place trays in [barrier bag/carton]. Add [approved moisture control] when specified.
- Close using [tape/strap/fastener pattern]. Maximum gross mass: [approved value].
- Apply label [label format] and record [lot/package number].
- Complete final check [form ID] and attach required photographs.
Which packaging should you choose?
| Part type | Common starting point | Benefit | Watch for |
|---|---|---|---|
| Small cosmetic housings | Individual bag or sleeve, divided tray and carton | Stops rubbing and fingerprints | Film residue and pressure marks |
| Precision machined parts | Custom tray, feature caps, cushioning and rigid carton | Controls position and protects features | Caps touching datums; particles in cavities |
| Brushed panels | Qualified film, separator and flat supported pack | Protects grain and edges | Adhesive aging and bending |
| Long extrusions | Wrap, separators, edge protection, bundle and pallet or crate | Supports handling and prevents contact | Banding dents and unsupported spans |
| Heavy housings | Blocked and braced crate or reusable container | Prevents load shift | Loads on weak walls and unsafe lifting |
How do you validate a new shipping pack?
Write the test plan before testing. Identify the package revision, part quantity, gross mass, distribution route, conditioning, test sequence and product acceptance criteria.
ASTM D4169 provides a framework for evaluating shipping units against distribution hazards. ASTM D5276 covers free-fall drop testing, ASTM D999 covers vibration testing, and ASTM D642 addresses compression. Select only the methods and severity that fit the actual route.
- Build the package exactly as the production instruction requires.
- Record parts, materials, quantities, closures and photographs.
- Condition and test the complete shipping unit using the approved plan.
- Do not replace damaged components during a sequential test unless the plan permits it.
- Open the package and inspect every part against the written criteria.
- Record package damage, part damage and any movement inside the pack.
- Correct the design, repeat the test when required and approve the final revision.
The ASTM packaging standards index lists additional methods. A standard number alone is not a test plan; route, severity and acceptance still need project approval.
Receiving and final-release checklist
| Check | Method | Pass condition |
|---|---|---|
| Part identity and quantity | Compare label, order and count | All fields and quantities agree |
| Cosmetic surfaces | Inspect under agreed visual conditions | No defect outside the approved standard |
| Critical features | Visual or dimensional inspection as specified | No damage or dimensional nonconformance |
| Cleanliness and moisture | Inspect parts, bags and cavities | No prohibited residue, chip, stain or moisture |
| Part restraint | Inspect position after handling or test | Parts remain separated and correctly seated |
| Package and pallet | Inspect closure, crushing, puncture and load shift | Pack remains safe and protects the product |
| Labels and records | Compare lot and shipment documents | Traceability is complete and readable |
How do you troubleshoot shipping damage?
| Damage found | Check first | Possible correction |
|---|---|---|
| Repeated rub marks | Part separation, cavity clearance and vibration movement | Add individual separation or improve restraint |
| Film residue or imprint | Film grade, storage time, heat and application pressure | Requalify film or change the contact method |
| Water stains | Part dryness, barrier seal, wet wood and condensation route | Correct drying and redesign the barrier system |
| Bent panel or extrusion | Support spacing, stacking load and strap position | Move supports, add stiffness or reduce load |
| Dented edge or housing | Movement, corner protection and carton strength | Improve cavity retention and impact protection |
| Debris in bores | Foam shedding, open caps and packing-area cleanliness | Change material, cap features and clean the area |
| Mixed lots | Layer identification, partial cartons and label control | Use one-lot rules or clearly separated and labeled subpacks |
Keep the damaged pack, labels and parts until the investigation is complete. Record where the damage appears and whether it repeats in the same orientation. This evidence helps distinguish a packing problem from handling, finish or manufacturing damage.
Control packaging changes
Review a change when it affects film, foam, tray, cap, carton, crate, quantity per pack, pallet pattern or shipping route. Compare the change with the approved pack and decide whether a material trial, movement check or full transport revalidation is required.
Update the packing instruction, photos, material list and label revision before release. Remove obsolete packaging materials from the work area so production cannot mix revisions.
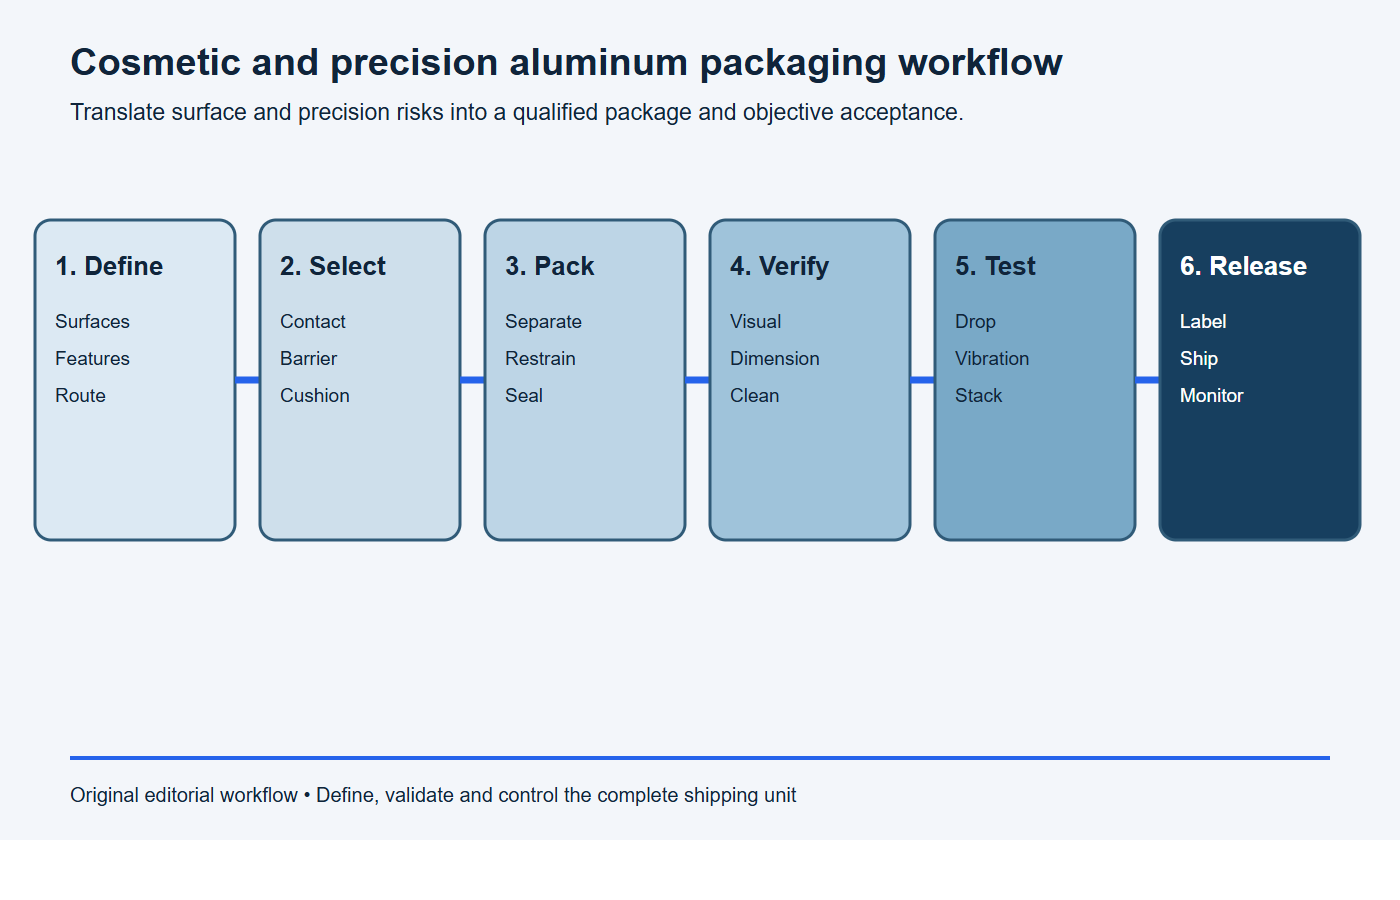
Use this packaging workflow
- Define: identify surfaces, features and route.
- Select: qualify contact, barrier and cushioning materials.
- Pack: separate, support, restrain and seal the parts.
- Verify: check appearance, dimensions, cleanliness and labels.
- Test: apply the approved distribution test plan.
- Release: approve the pack and monitor receiving results.
Frequently asked questions
Does every cosmetic aluminum part need protective film?
No. Use film only after checking adhesion, residue, storage time and finish compatibility. An individual clean sleeve or tray may be safer for some textures and shapes.
Is bubble wrap enough for precision aluminum parts?
It may provide cushioning, but it does not automatically control part position, protect datums or meet cleanliness requirements. Use it only as part of an approved pack.
Should every package receive a drop and vibration test?
No. Testing depends on product risk, package history, distribution route and customer requirements. New, changed or high-risk packs usually need stronger evidence than a proven routine pack.
When should the customer approve the packaging?
Obtain approval before production shipment when the drawing, purchase order or quality agreement requires it, or when appearance, cleanliness, damage risk or returnable packaging makes the pack a critical product requirement.
Request a packaging review
Send the drawing revision, alloy and temper, finish, cosmetic map, critical features, cleanliness requirement, quantity per pack, shipping route and customer packaging specification through BAOSONG’s contact page. These inputs allow the packaging plan to be reviewed alongside manufacturing and inspection requirements.
Recommended Downloads for Packaging & Cosmetic Protection
Use these BAOSONG reference files to define protection, appearance acceptance and release documentation for aluminum components.
- Packaging & Cosmetic Protection Guide (PDF)
- Packaging Requirement Template (editable Excel)
- Cosmetic Surface Requirement Template (editable Excel)
- Appearance Requirement Template (editable Excel)
- Inspection & Documentation Guide (PDF)
Need help matching the files to your drawing or packaging route? Contact BAOSONG engineering support.